Note: OS MasterMap® Topography Layer can be downloaded in DWG format directly from Data Download. However we recommend importing MasterMap in GML format where detailed analysis of attribute information is required, or where you wish to control which feature classes are imported as the GML import has greater flexibility in these areas. If you do not need to do detailed analysis of the attribute information, downloading MasterMap in DWG format may meet your requirements.
AutoCAD Map 3D has a built-in importer that is able to import OS MasterMap data in either GML or GZ formats so it is not necessary to uncompress the .GZ files obtained from Digimap. It will also import both Topography and ITN Layers, although additional software may be required to carry out network analysis or other work using the ITN data.
Comprehensive instructions on how to use the AutoCAD OS MasterMap importer are available on the Autodesk website, summary instructions are provided below.
The first step is to unpack the zip file downloaded from Digimap to a suitable local or network location. You can use any program you are familiar with to unpack the zip file e.g. WinZip, 7-Zip or the in-built Windows utility. To use the in-built Windows utility right click on the zip file and select ‘Extract All…’ from the popup menu, this will then prompt you where to save the extracted files.
In AutoCAD Map 3D open the mastermap.dwt drawing template. If you don’t have this template you can download it from the AutoDesk website at: http://www.autodesk.co.uk/adsk/servlet/item?siteID=452932&id=7986865
You will see a prompt informing you that the AEC objects in this template will be updated, click ‘close’.

Click on Map Import on the Insert menu:

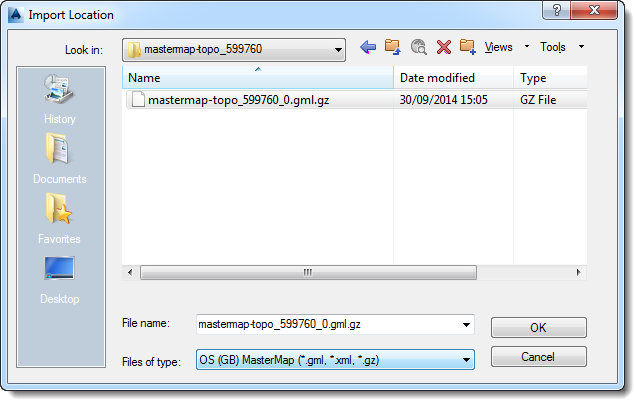
Browse to the .gz file you downloaded from Digimap. Note you will need to unpack the .gz file from the .zip file you downloaded from Digimap but you should not unpack the data from the .gz file before importing it. Ensure you change the file type to ‘OS (GB) MasterMap (*.gml, *.xml, *.gz)’.
On the Import window, to ensure that attributes are imported along with the geometries of features, it is necessary to specify the Attribute Data to import next to each Input Layer.
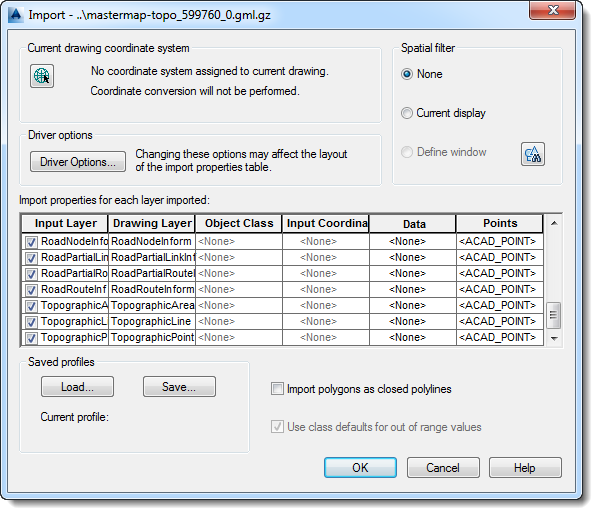
For the TopographicArea, TopographicLine and TopographicPoint Input Layers click on <None> in the Data column.
Select Create object data:
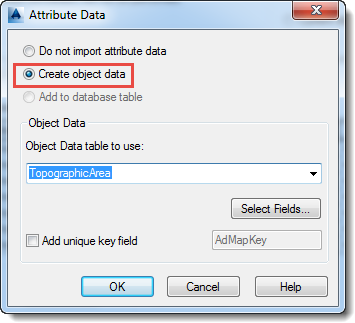
Click OK on the Attribute Data window (above). You may see a warning message telling you some attributes cannot be imported.
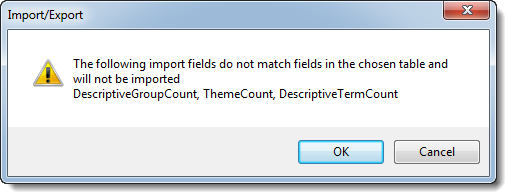
Repeat steps 7 and 8 for the TopographicArea, TopographicLine and TopographicPoint Input Layers. Once all have been set, click OK in the main Import window (below):
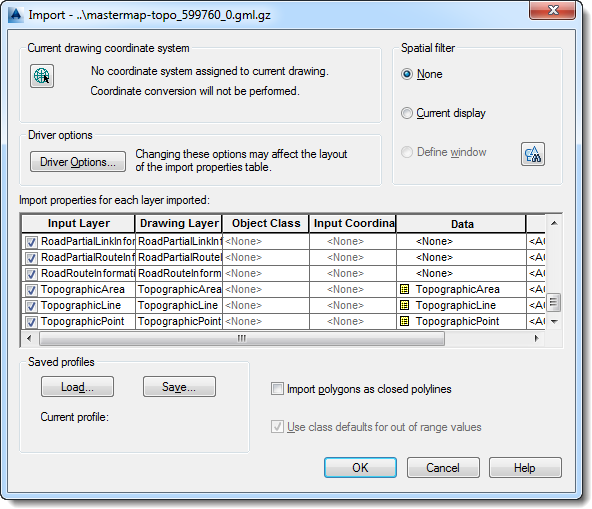
The import should then start automatically.
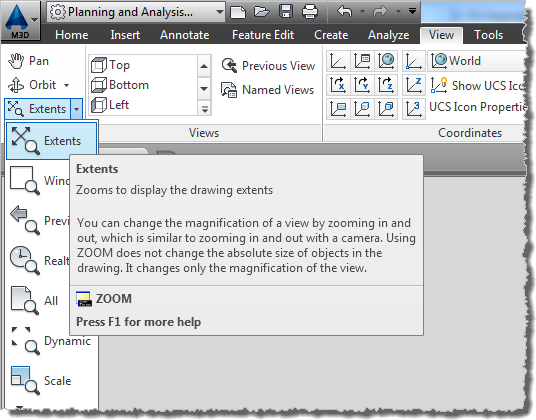
To view the data you may need to change the extents of the map window. In the ribbon interface this is located in the View tab under Extents:
Once you have loaded the data, you must right-click on Topographic Layer in the Display Manager window, located in the Task Pane on the right hand side, and select Update so that the data is represented using Ordnance Survey colours:
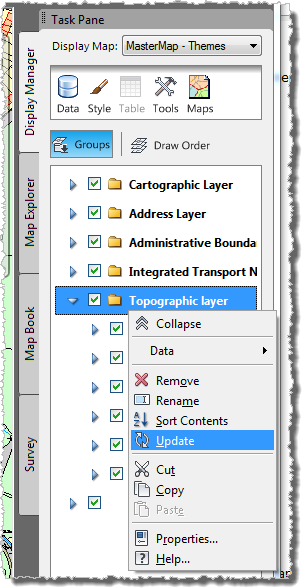
Repeat the previous step for the Cartographic Layer to ensure cartographic symbols and text is displayed correctly.

You should also make sure to Save your imported drawing to another filename before exiting, so you can re-use the template for importing more data.